Automated Pipeline from Google Forms to Snowflake
Objective
A while ago I worked on a project involving the analysis of large amounts of text data obtained from surveys using Google Forms. I was looking for ways to extract meaningful insights from many thousands of text submissions. I chose to work in Snowflake given the ability to use Python packages for natural language processing, Large Language Models for summaries and Streamlit for visualization.
At the time, I loaded all of the data manually. However, I was curious what it would take to automate the data loading and create a live dashboard of the survey results.
The objective of this project was to automatically load survey text data from Google Forms into Snowflake to later analyze it using its LLM capabilities.
Requirements
We’ll use Google Forms, Apps Script, Google Cloud Run, and Snowflake Node Connector.
Process
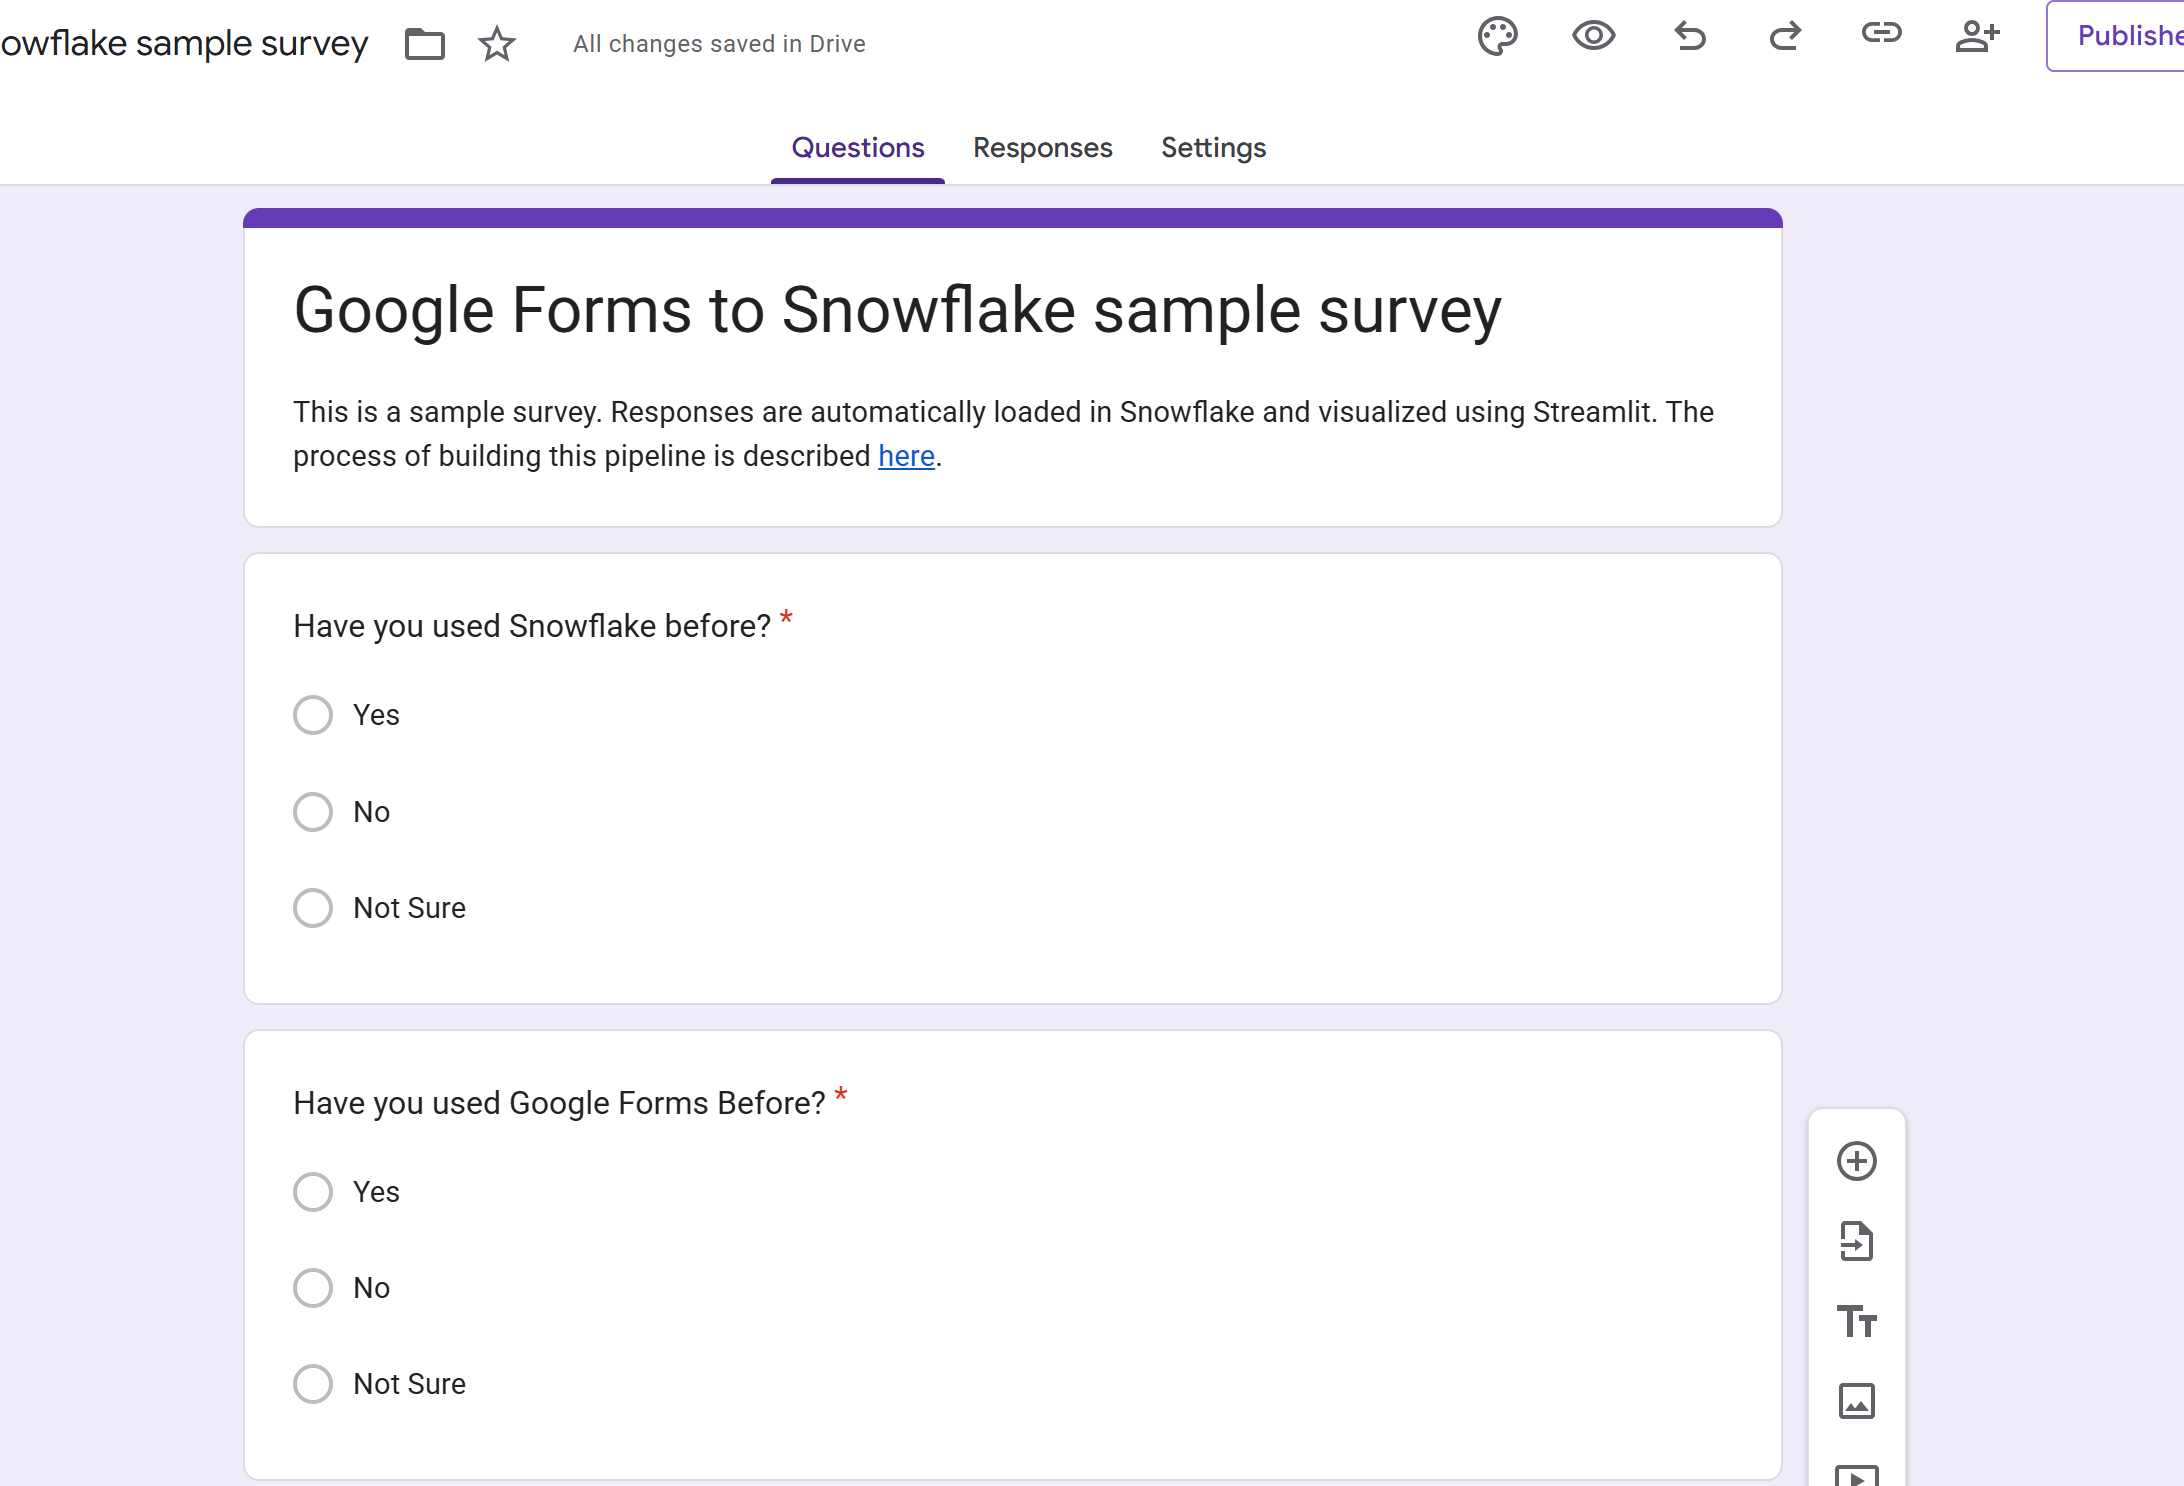
- Create your survey in Google Forms
- When the survey is published, navigate to the ‘Responses’ tab and click on the spreadsheet icon.
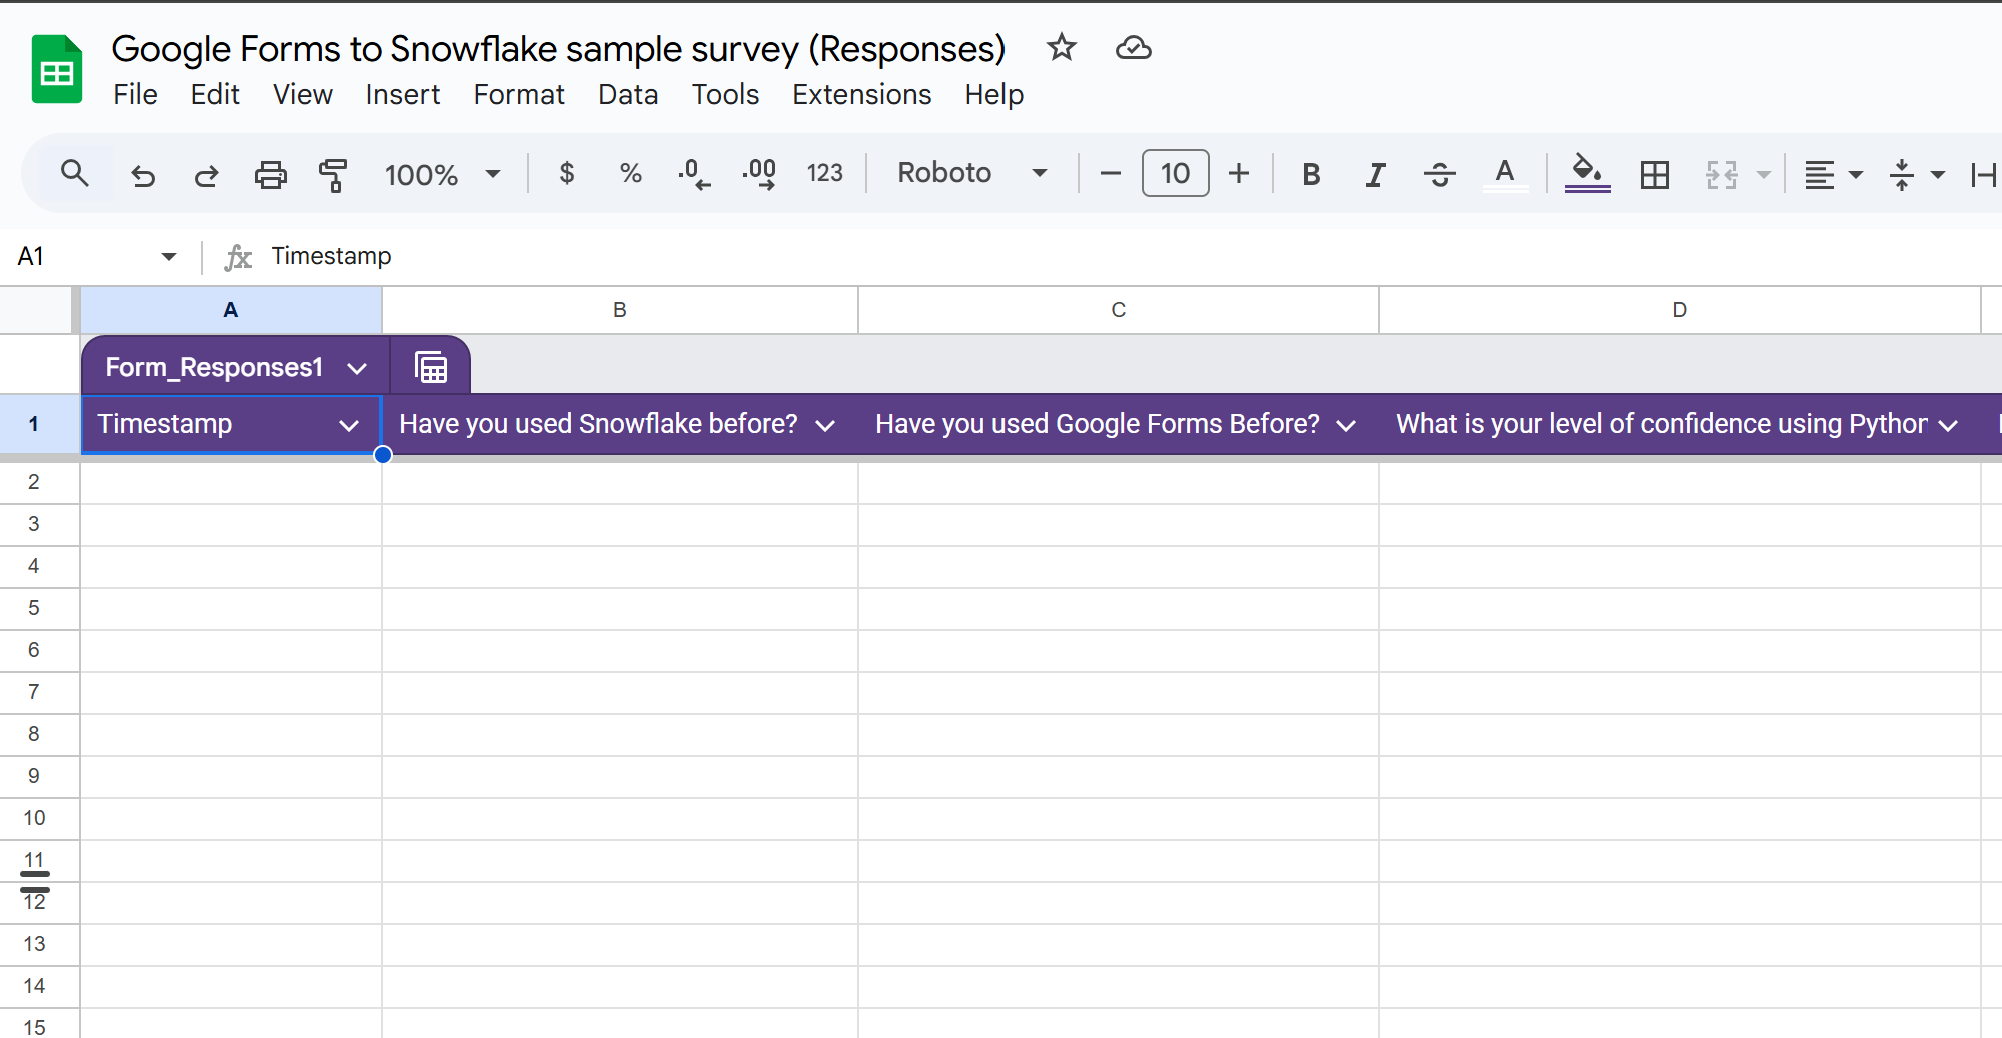
- Open the spreadsheet and click on the ‘Extensions’ tab and then on ‘Apps Script’.
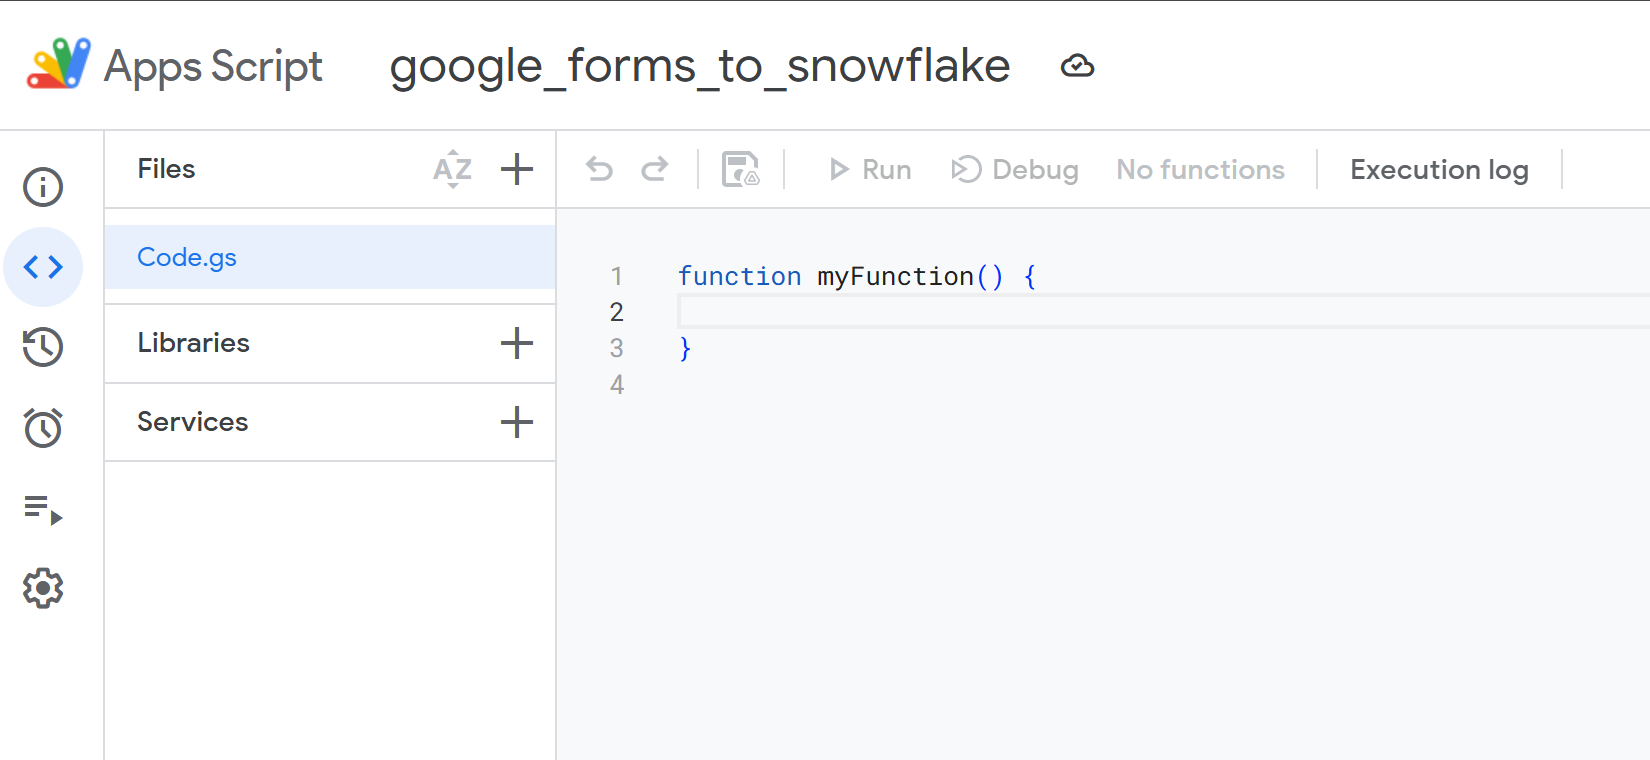
- Create a new function using this JavaScript code:
#| eval: false
#| echo: false


function myFunction() {
  var ss = SpreadsheetApp.getActiveSpreadsheet();
  var sheet = ss.getSheets()[0];
  var range = sheet.getRange("A2:E");
  range.sort({column: 1, ascending: false});


  var url = "";
  var headers = {
             "contentType": "application/json",
             "headers":{"X-PW-AccessToken": "<TOKEN>",
                        "X-PW-Application": "developer_api",
                        "X-PW-UserEmail": "<USER_EMAIL_ADDRESS>"}
             };
  console.log("start");
  UrlFetchApp.fetch(url, headers);
  console.log("end");
}- In Google Cloud, create a new Project
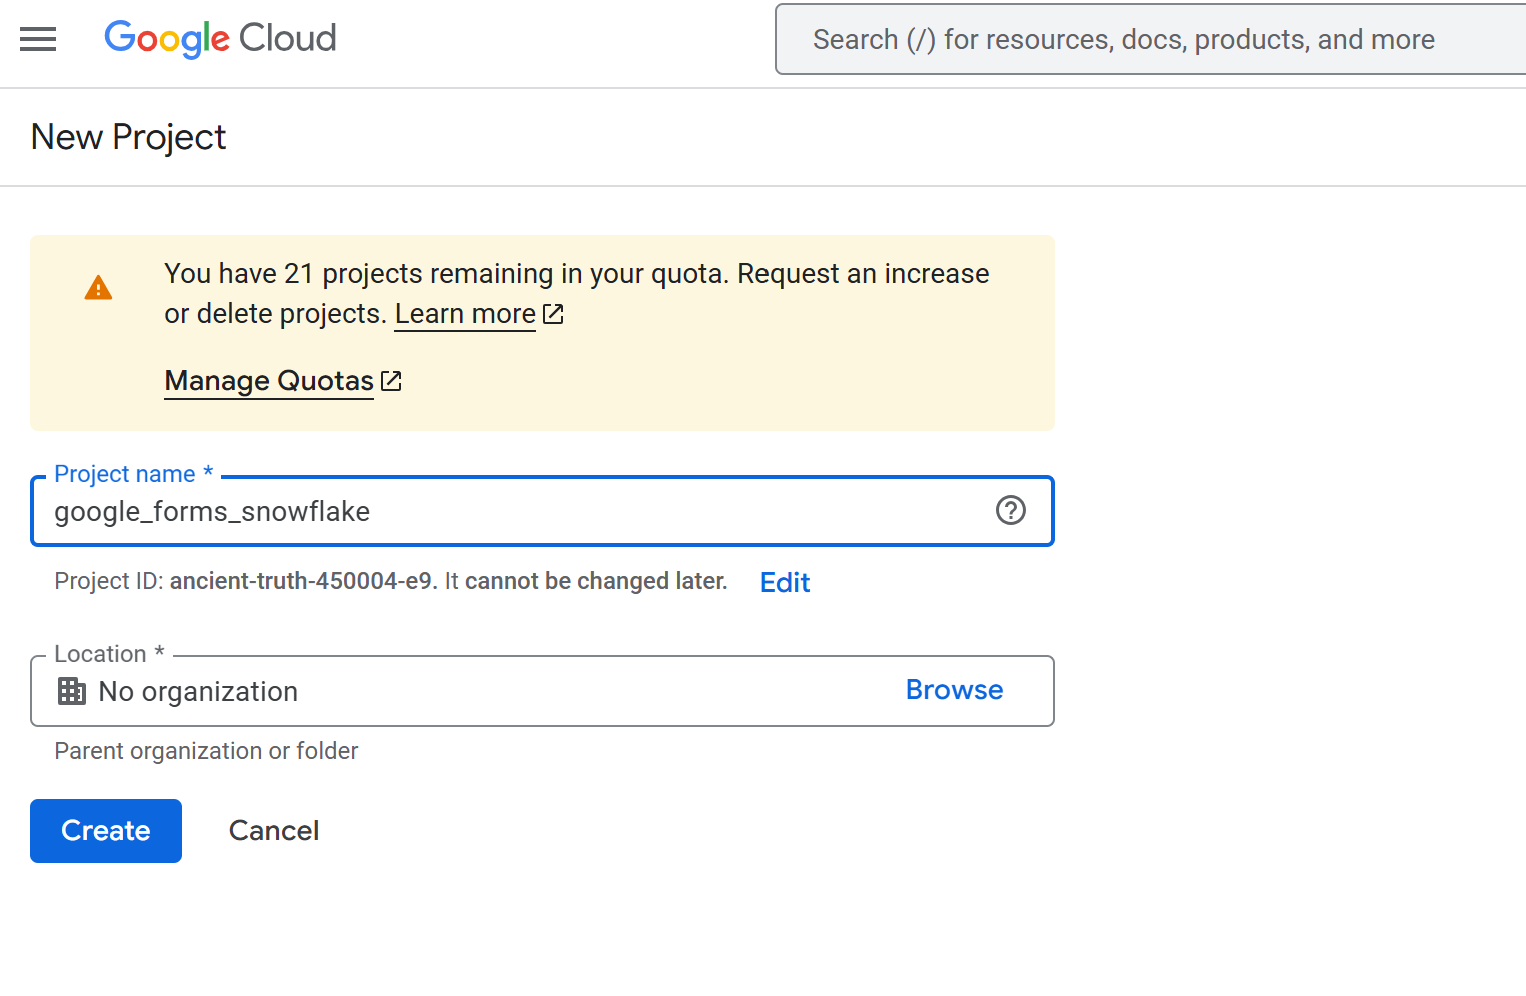
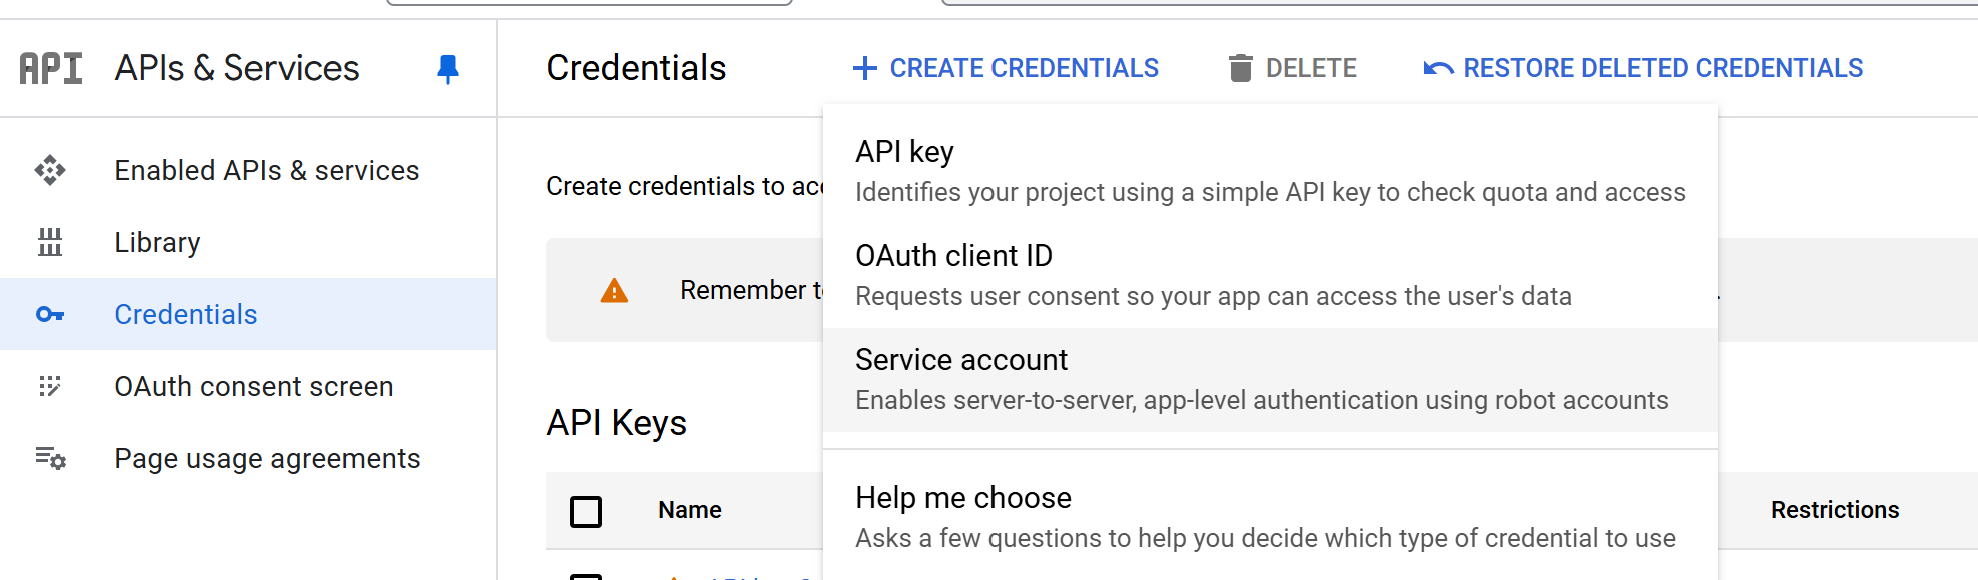
- Navigate to the API credentials section of the Google Cloud Console.
- After creating a service account linkedd to your new project, go to the page of that service account and in the ‘Keys’ tab select ‘Add Key’. Select the JSON type.
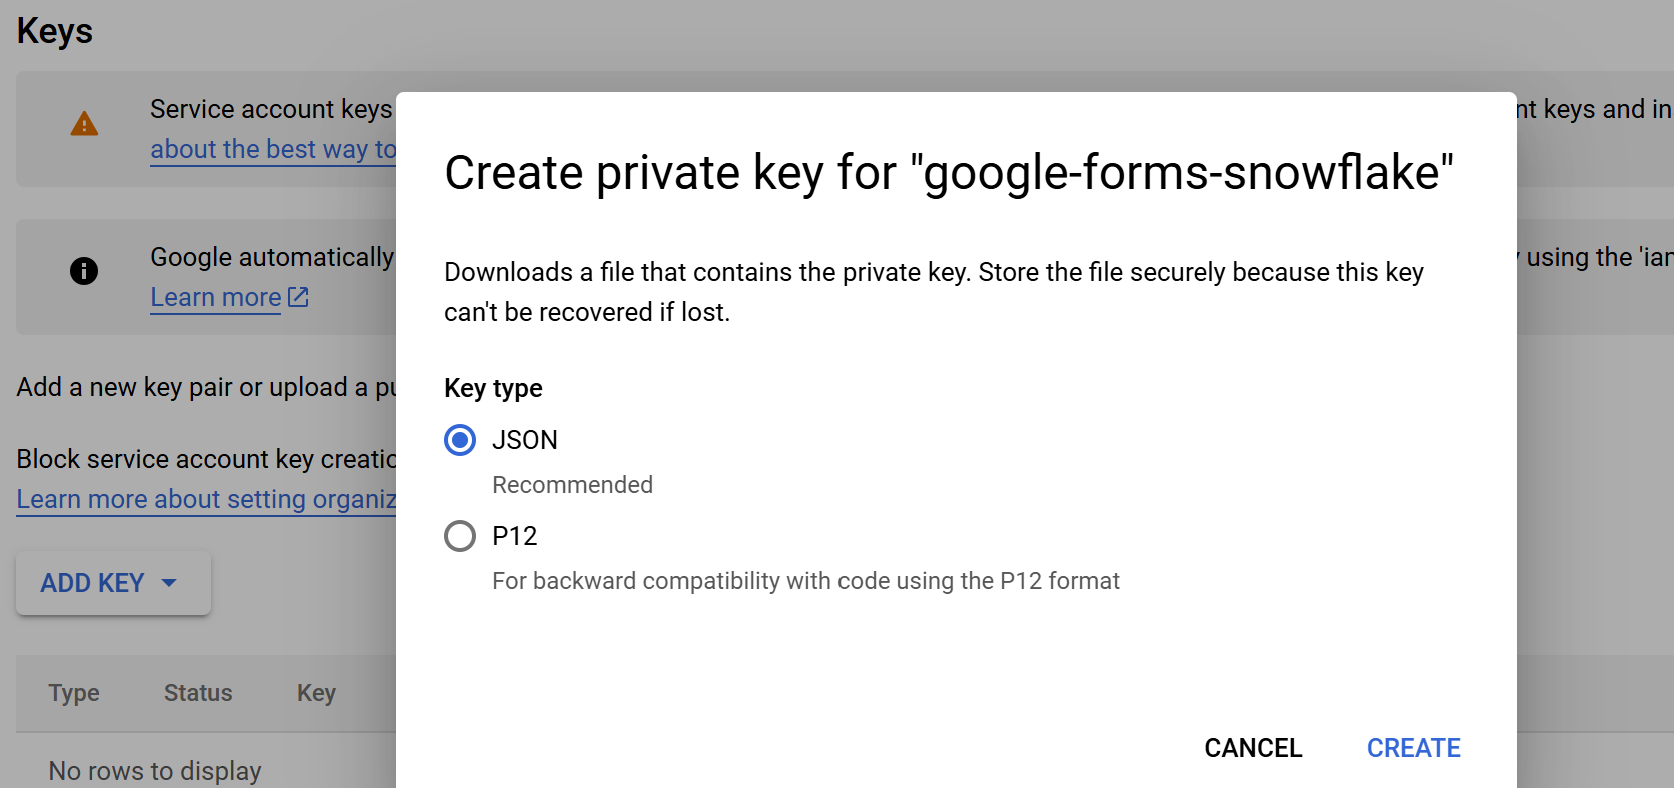
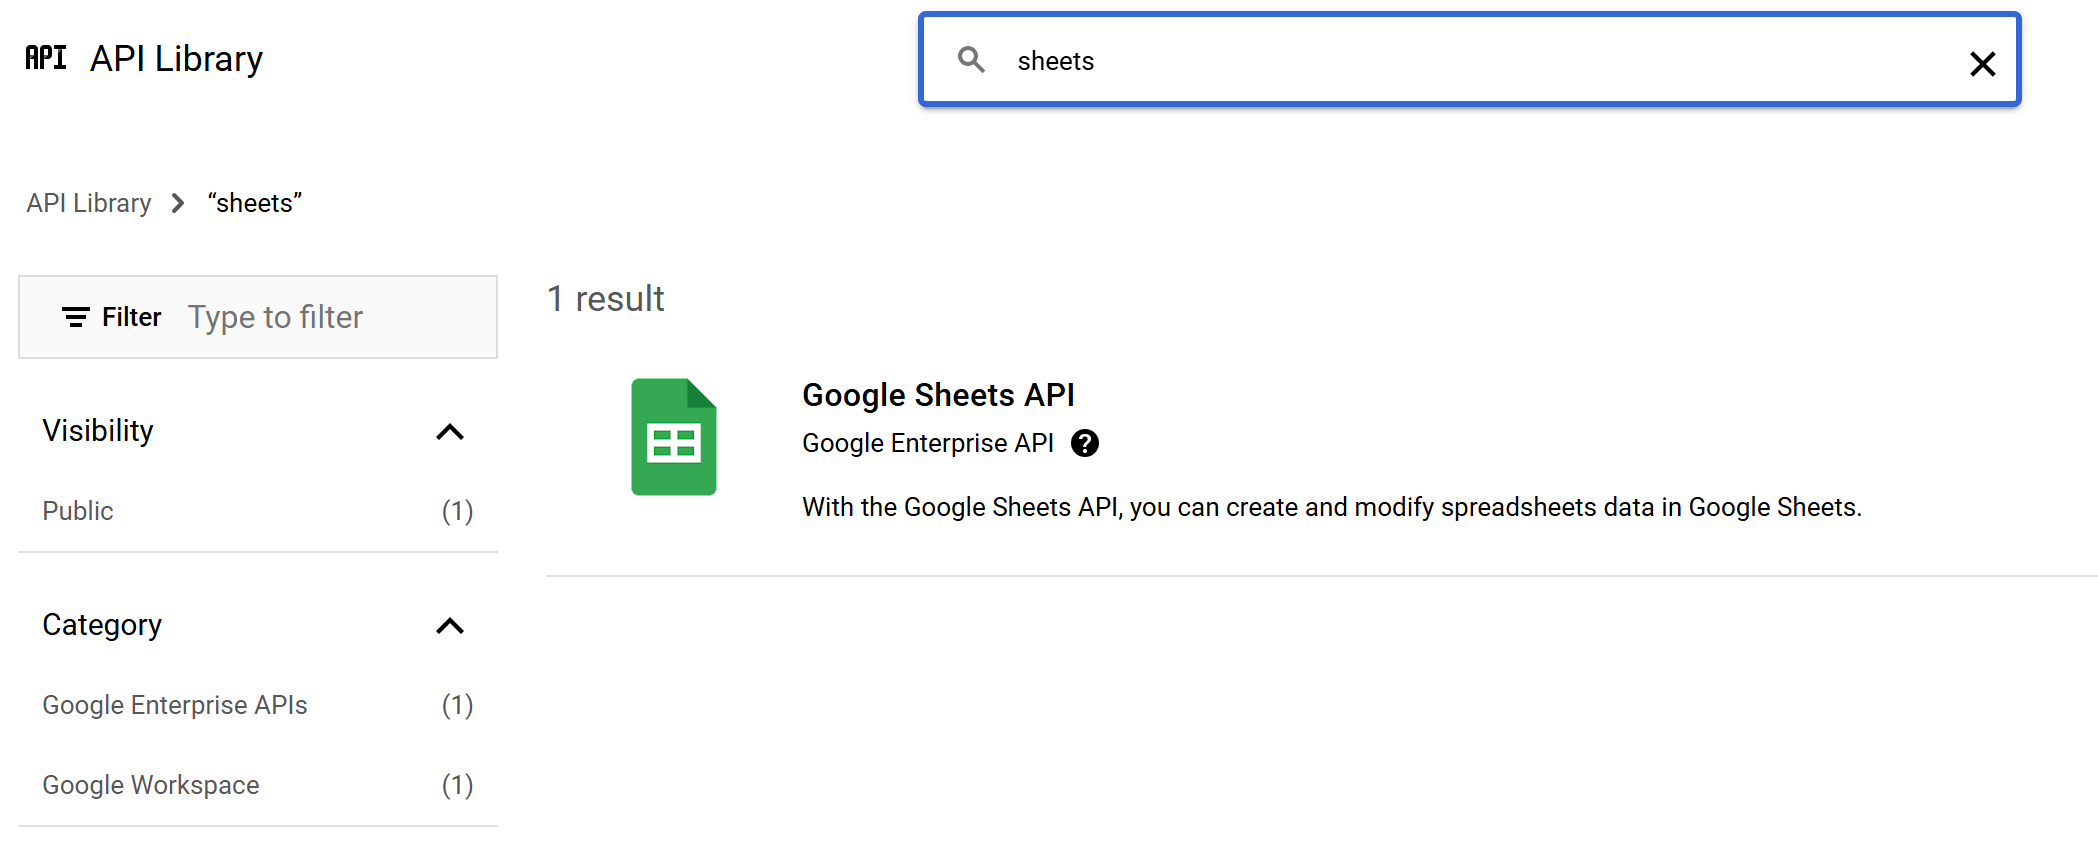
This creates the key and downloads a local key file in JSON format. While we’re here enable the google sheets api that will allow us to use our new key.
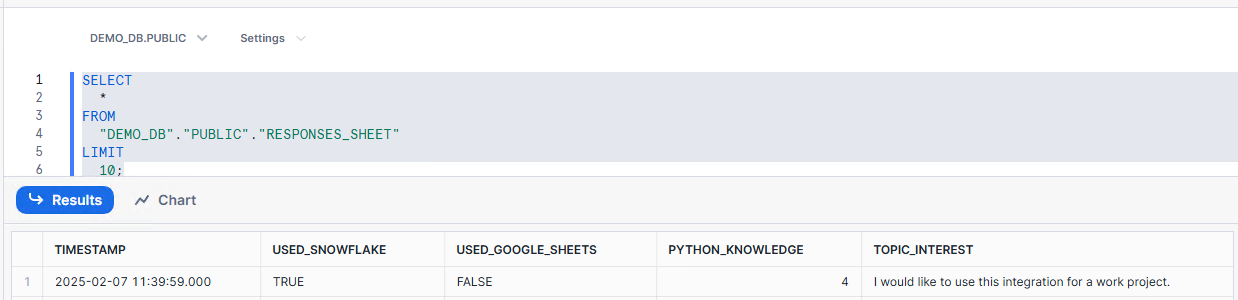
- In Snowflake, create a new table to store new records from Google Sheets. I’ve called it ‘responses_sheet’. This table will be referenced in the insert statement later on.
- Set up the Google Cloud Run service to fetch latest data from Google Sheets and deliver it to Snowflake. A detailed guide to building and deploying a Node.js web app to Cloud Run is here. We’ll need to create 3 files that will be uploaded to the service.
const path = require('path');
const {google} = require('googleapis');
const sheets = google.sheets('v4');
const snow = require('snowflake-sdk');
const express = require('express');
const app = express();

const getInvite = async () => {
    const auth = new google.auth.GoogleAuth({
    keyFile: path.join(__dirname, 'creds.json'),
    scopes: ['https://www.googleapis.com/auth/spreadsheets'],
  });
  google.options({auth});
  const res = await sheets.spreadsheets.values.get({
    spreadsheetId: <sheets id>,
    range: 'A2:E2',
  });
  const row = res.data.values;
  if (!row || row.length === 0) {
    console.log('No data found.');
    return;
  }else {
    console.log(row)
  }
  const connection = snow.createConnection(
    {
      account: <locator>.<cloud provider>,
      username: <username>,
      password: <password>,
      warehouse: 'COMPUTE_WH',
      database: 'DEMO_DB',
      schema: 'PUBLIC',
      role: 'ACCOUNTADMIN'
    }
  );
  const conn = connection.connect();
  conn.execute({sqlText: 'INSERT INTO DEMO_DB.PUBLIC.SHEETS
  (TIMESTAMP, USED_SNOWFLAKE, USED_GOOGLE_SHEETS, PYTHON_KNOWLEDGE, TOPIC_INTEREST) values(?, ?, ?, ?, ?)', binds: row});
  }

const port = process.env.PORT || 8080;
app.listen(port, () => {
  console.log('listening');
});

app.get('/', (req,res) => {
    getInvite();
    res.send('Adding Data');
});
# Use official Node.js image.
# https://hub.docker.com/_/node
FROM node:16

# Create and change to the app directory.
WORKDIR /usr/src/app

# Copy application dependency manifests to the container image.
# A wildcard is used to ensure both package.json AND package-lock.json are copied.
# Copying this separately prevents re-running npm install on every code change.
COPY package*.json ./

# Install production dependencies.
RUN npm install

# Copy local code to the container image.
COPY . .

# Run the web service on container startup.
EXPOSE 8080
CMD [ "node", "index.js"
{
  "name": "node-sheets-to-snow",
  "version": "2.0.0.",
  "description": "google sheets to snow connector with oauth",
  "main": "index.js",
  "scripts": {
    "start": "node index.js"
  },
  "engines": {
    "node": ">=12.0.0"
  },
  "dependencies": {
    "express": "^4.18.2",
    "googleapis": "^105.0.0",
    "snowflake-sdk": "^1.6.14"
  }
}
One thing to note is that for security reasons, it’s worth creating a dedicated service user in Snowflake and grant it a role with privileges limited to inserting records into our table in the PUBLIC schema. You can read more about how to do this here. User login and password should never be hard coded in the index.js file. Instead, you can use Google’s Secrets Manager which integrates nicely with Google Cloud Run services. Login and password (or RSA key-value pairs) can be accessed from within the index.js file as environment variables.
Understanding the Data Pipeline
Data Source: Overview of Google Forms and how data is captured. Data Pipeline Architecture: Diagram of data flow from Google Forms to Snowflake. Explanation of each component in the pipeline. Step 1: Setting Up Your Google Forms
Designing the survey for quality data capture. Configuring Google Forms to automatically store responses in Google Sheets. Tips for exporting data. Step 2: Automating Data Extraction
Overview of integration options (Google Apps Script, Zapier, etc.). Sample code snippet using Google Apps Script to extract data. Scheduling automated exports. Step 3: Loading Data into Snowflake
Overview of Snowflake’s data ingestion options (Snowpipe, bulk load, etc.). Walkthrough of setting up a Snowflake stage and creating a table. Sample scripts/SQL for data loading. Tips for error handling and performance tuning. Step 4: Leveraging Snowflake’s LLM Capabilities
Introduction to Snowflake’s LLM offerings. Use cases: How LLMs can transform text analysis (e.g., sentiment analysis, trend detection). Example queries or procedures that integrate LLM functions. Security considerations and best practices. Step 5: Full Pipeline Demonstration
A real-world example of the entire workflow. Walkthrough of the pipeline from form submission to text analysis. Screenshots, code snippets, and explanations. Advanced Topics & Best Practices
Performance optimization for large-scale text analysis. Strategies for monitoring and error handling. Future enhancements (adding more data sources, refining the analysis with advanced NLP). Conclusion
Recap of the key steps and benefits. Final thoughts on automating data pipelines for survey analysis. Invitation for feedback and further discussion. Resources & References
Documentation links for Google Forms, Snowflake, and integration tools. Links to code repositories and further reading materials.